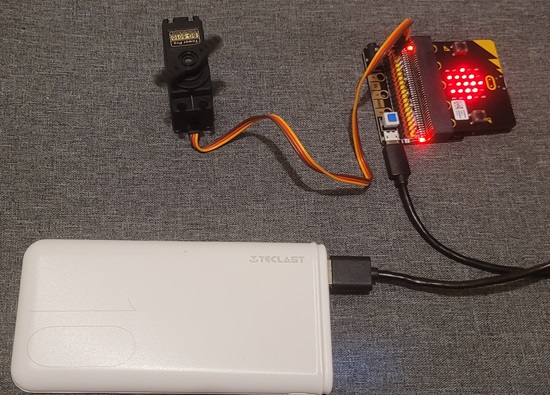
Servo motors are vital in robotics. They serve as the device that create movement. By virtue of the way in which they work, servo motors have a special feature in that torque, speed and position can be controlled precisely, and therefore very fine and dynamic movements can be established.
Do take note that commercially available servo motors have different characteristics in their operating voltage and angle of rotation. Most of them operate in +5 volts, come in 180 or 360 degrees and able to handle varying torque loads or lift heavy objects .
Also, most servo motors in the market require a starting current that the micro:bit may not able to supply efficiently especially when you are using multi-servo motors in a project. Note that micro:bit operates with 3 volts and most servo motor needs 5 volts. A separate source of power is recommended and would probably depend on the type of servo-motor you have and number of units that you are going to deploy in your project.
For projects that need multiple servo motors, it is recommended to use separate servo controller module. Though the micro:bit can easily handle a single small servo motor provided it operates on 3.3 volts.
Common servo controller modules available in the Philippine market
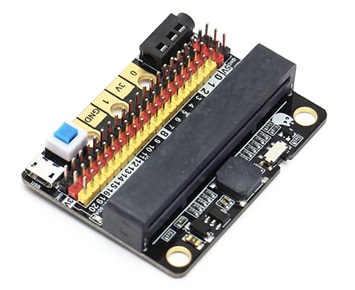
KittenBot IOBit v2.0 – https://www.kittenbot.cc/products/kittenbot-iobit-v2-0-for-microbit
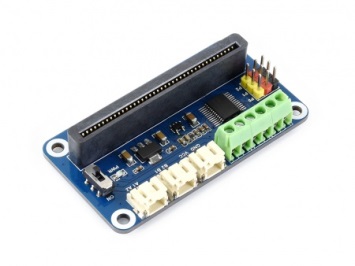
WaveShare Motor Driver for micro:bit – https://www.waveshare.com/wiki/Motor_Driver_for_micro:bit#Programming_Guide
Useful Reference Link:
Brief Guide to Servos – https://youtu.be/okxooamdAP4
MG 996R Servo Motor
The MG 996R is a popular servo motor within the robotics community. It is the preferred servo motor because of its torque capacity unlike the beginner model SG90. It comes in models with 180 degree and 360 degree (continuous rotation) – consult the specification of your chosen model.

Programming a servo
Servo motors are controlled by sending control signals, typically in the form of Pulse Width Modulation (PWM) signals, to the servo’s control pin. It sends a series of high speed on/off pulses to the servo which sets its target position. eg 0, 90, 180 degrees or in a continuous 360 degree model be able to move in forward or reverse direction and stop.
MakeCode Block Program Sample

The sample program above turns the 180 degree servo motor model from 0 degrees to 180 degrees and back again after a pause of 2 seconds in an infinite loop. Get the servo function by adding it from the toolbox thru the Extensions category. Do take note that the simulation graphics representation on the left needs to be modified – please see wiring connections below.
Wiring Connection
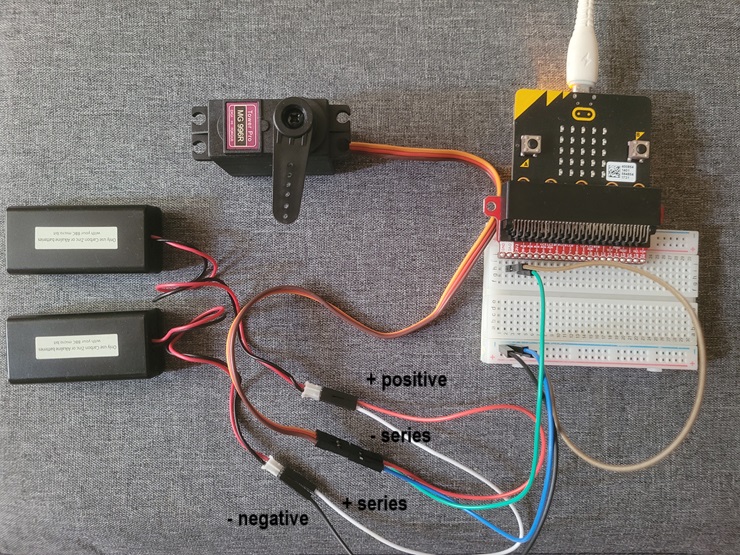
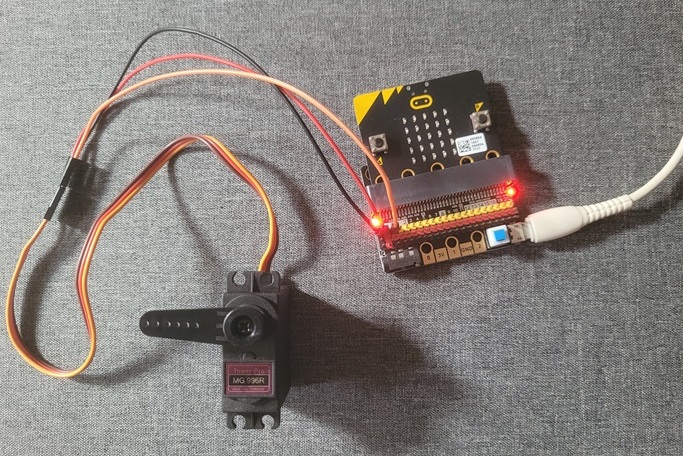
It is advisable to power up our servo motor thru a separate power source. Most micro:bit kits include a 3 volt external supply that run on batteries. If you have two of this, you can connect them in series and have a 6 volts power source. Just make sure to tap the GND (negative) of the 6 volt external power source to the micro:bit GND when you are running your project. DO NOT tap the positive side to the micro:bit as this will damage it.
Notes:
When utilizing IOBit controller, if P0 is used as a normal IO port, the buzzer toggle switch must be turned off, otherwise the buzzer will sound or the IO read value will be abnormal. Also, the USB port allows a maximum input current of 1A so you can drive multiple small servos.
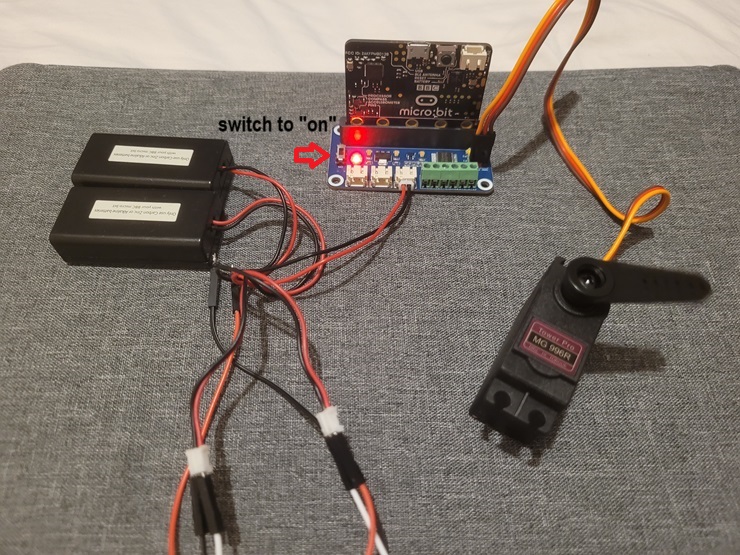
To power up your WaveShare, you need to supply it with 6v external battery (Vcc is 6v to 12v). To connect the power source, you need a JST connector or screw the lead pins of your power source to the VIN terminal (green terminal with screw on top – labeled Vcc & GND).
You can directly connect your servo motors to the WaveShare and it will supply 5v to the motor. Three servo motors can be directly connected and labelled with control pins P0 to P2.
360 Degree or Continuous Rotation Servo Motor
A 360 degree servo motor operates differently than a standard server motor. Instead of rotating in a specified angle, the 360 degree servo moves forward continuously when given a longer pulse (e.g. 180 degrees) or moves in reverse direction when given a low pulse (e.g. 0 degree) and goes on full stop when a 90 degree is applied. The code below demonstrates how it works:
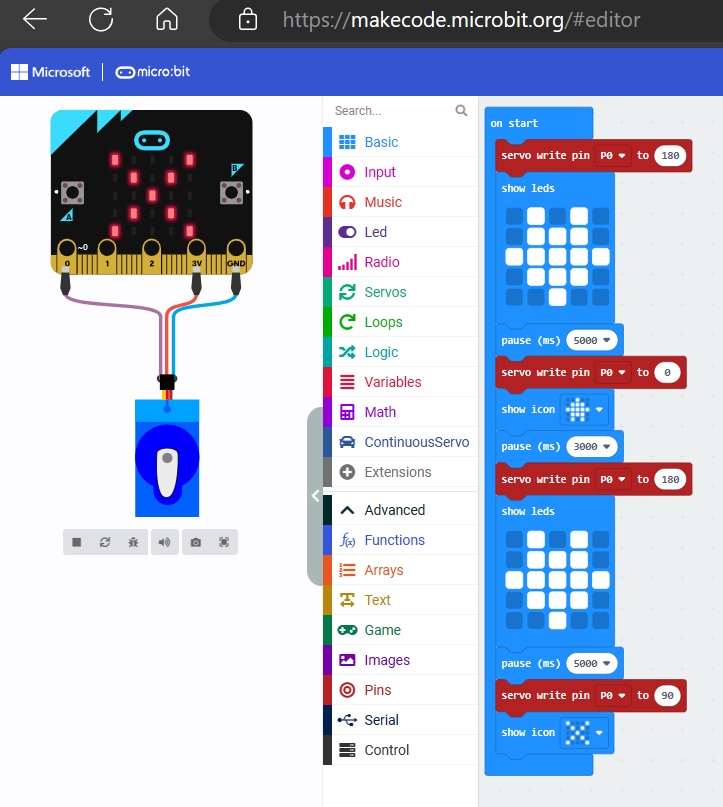
The above code spins the motor forward continuously for 5 seconds and displays the down arrow on the built-in micro:bit LED, then spins in reverse continuously for 3 seconds and displays the up arrow and spins forward again for another 5 seconds and completely stops and displays X on the built-in LED display.
