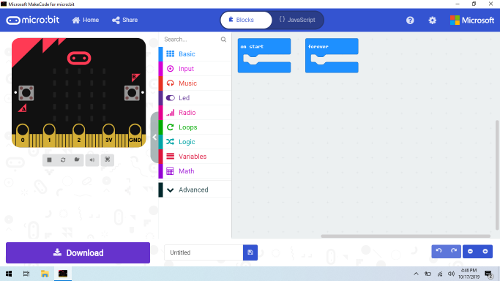
MakeCode block programming editor is made by Microsoft and is a free and open source platform for students who have no experience in programming. It uses colored blocks that are group by functions and can be drag and drop to the workspace to construct programs. It has an interactive “live” simulator that provides students with immediate feedback on how their program is running and makes it easy to test and debug their code. You don’t even need to have a physical micro:bit device to explore and learn programming, the simulator takes your code and shows you the output.

The MakeCode editor was formerly called PXT – Programming eXperience Toolkit. It is similar to Scratch and the new editor has more blocks than the original editor.The MakeCode editor was originally created as a cross platform editor that can be used by just using your favorite web browser and opening the URL https://makecode.microbit.org. You need to be online to access it. For countries with slow Internet connection, this requirement may be a disadvantage – specifically when several students are accessing the site simultaneously. Luckily, Microsoft developed an offline version which is what we are going to use for the rest of the tutorials.

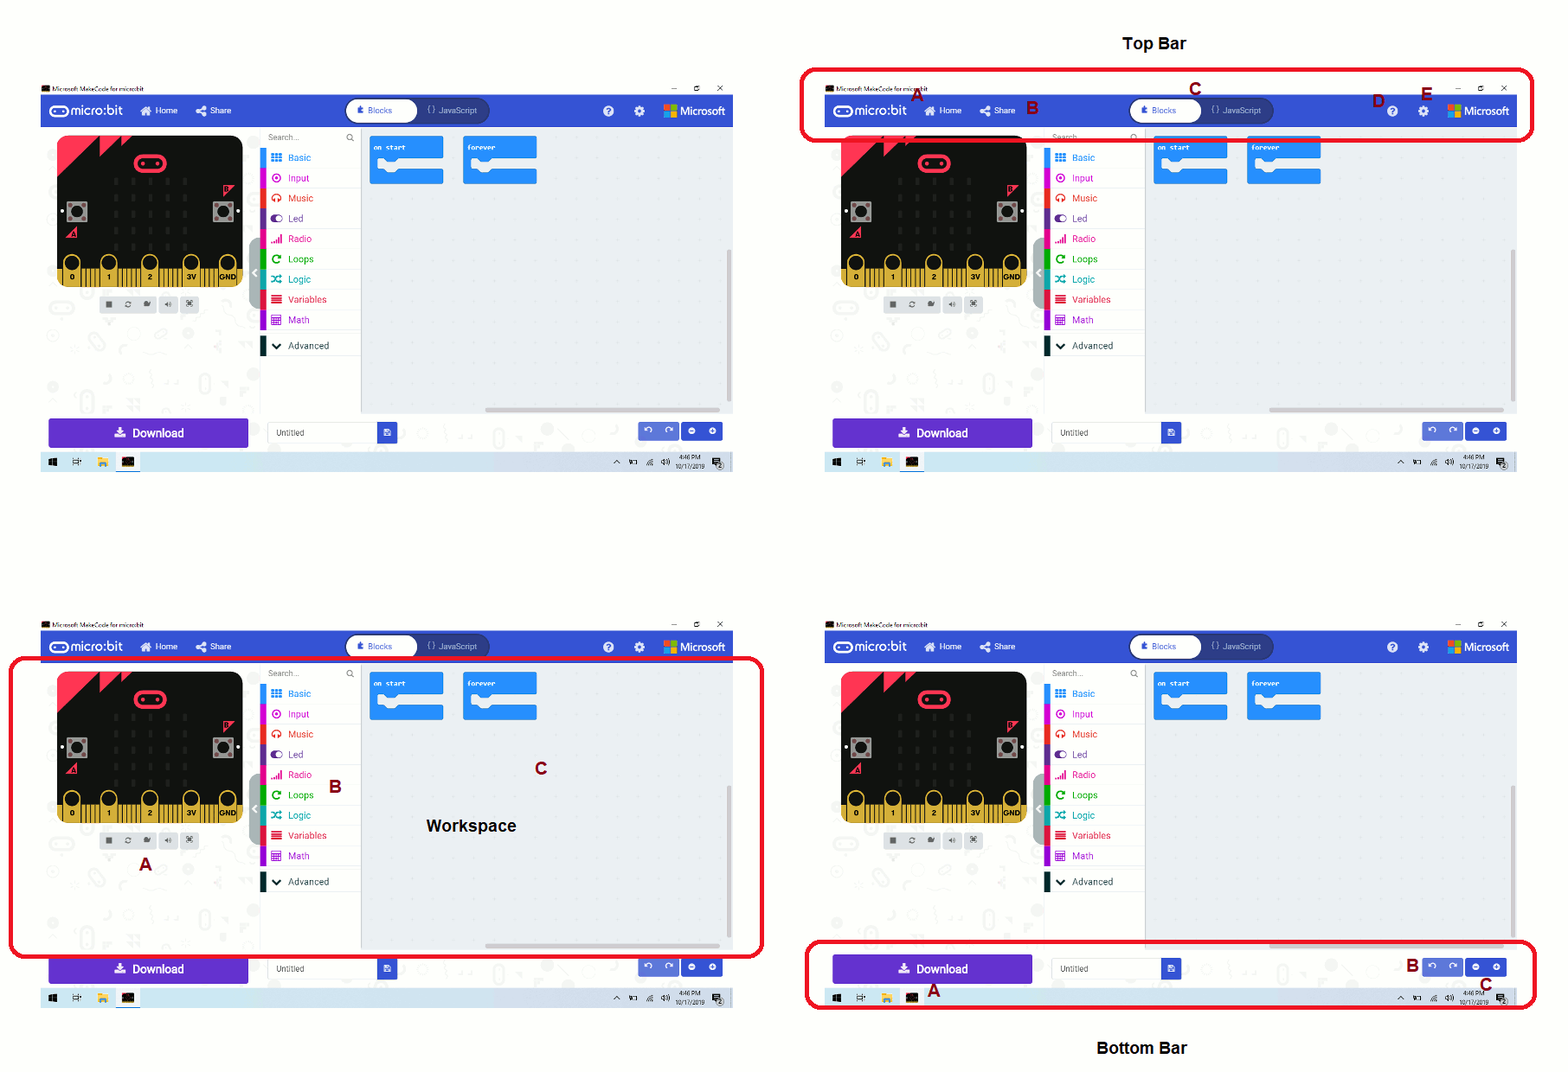
Parts of the Editor
Top Bar:
A. Micro:bit logo and home button – takes you back to the project page.
B. Share button – allows you to share your project in the cloud in a number of different ways with your friends.
C. Block/JavaScript toggle button – allows you to switch between Block programming or JavaScript programming editor
D. Help button – gives you access to resources and references on topics when using the Block or JavaSript editor
E. Settings button – allows you to change project properties and delete projects.
Workspace:
A. Simulator – allows you to see the output of your program code even without a physical micro:bit device. It is a virtual micro:bit.
B. Block Library – color coded blocks which are group by function which you use to build your program.
C. Program Space – its the area where you drop the blocks to build your code.
Button Bar:
A. Download button – allows you to save your project and download your project as a .hex file. The offline version directly saves the code to your micro:bit.
B. Undo/Redo buttons – self-explanatory.
C. Zoom button – allows you to magnify your view in the program space.
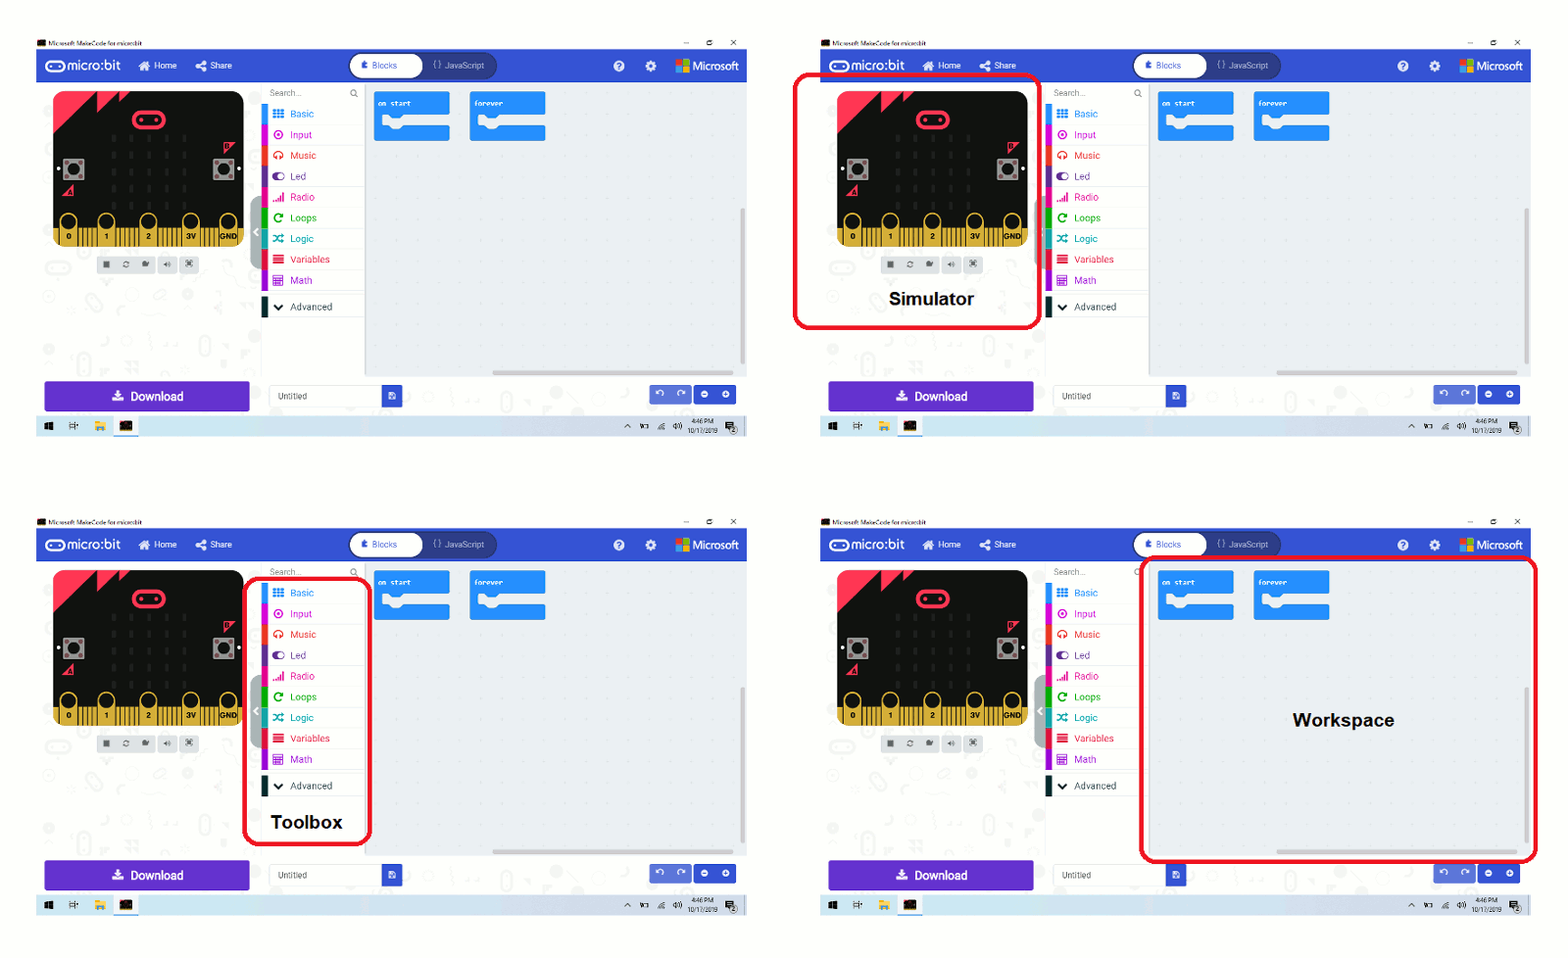
Note: The official Microsoft documentation only identifies three main areas of the MakeCode editor: Simulator, Toolbox and Workspace.

